Hello, everyone. I am concerned about Aunt Zhang since this year. I started in the pit of Lego at the beginning of the year and I was sent a WeChat link by my partner. "Is this SMZDM a software of God?" So I was planted a grassland in my heart. A lot of preferential information to buy buy, especially the most favorite original article section, is simply to see the new world of pickpockets ah!
Closer to home, this is my first original article. The reason is that my laptop has been in disrepair for a long time. After graduating from college, I have no need to go out with a computer. I usually use my company’s computer at work, so I’m thinking about changing in the second half. The desktop pressure press field can be easily used for games and image processing. At that time, the machine was fancy and was well received by the students after they bought it:
In this price can be regarded as a very cost-effective way ~ on the occasion of preparations for the order, suddenly realized that my mobile phone is still using the iPhone5, popular in this 4G network, fingerprint unlocking times like homely, my Small 5 behind is not a bit two points, but unfortunately in the bag shy, in the case of two elections to choose to buy love crazy 7 in the momentum of Apple is still feeling a hand.
Since I chose to continue to use my laptop, this is certainly not the way to go now. Open a web page to be able to hold a card for a while. I can hear the powerful rotation of the fan inside the machine. In the laptop, the fire attacked the heart and xx on the brain, then give it a clean gray for silicone!
First to introduce the protagonist of this time, Samsung RV411, Dangdang Dangdang Dangdang!
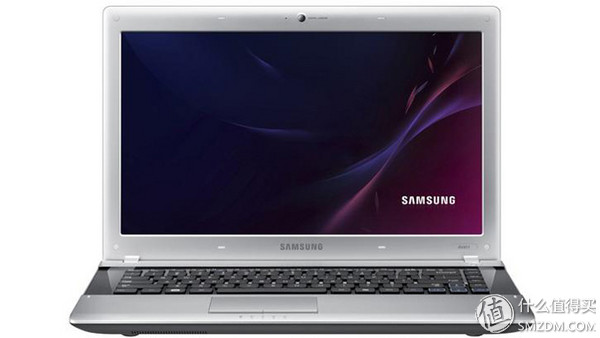
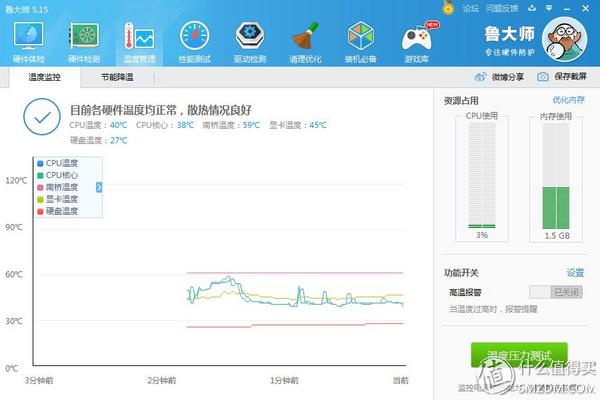
Official map town field, my own books naturally no hot and bright and beautiful ~ Next to the configuration of this book slightly, screenshots from Master Lu,
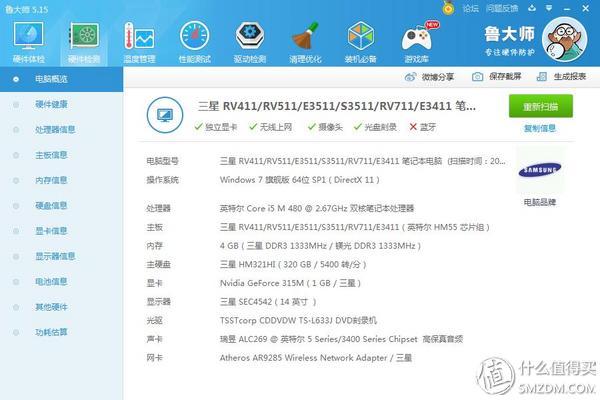
This configuration is in a mess that is now lagging behind. As it is more than enough to go online and watch a movie, what is the temperature before the dust removal?

This is the temperature of the static state after power-on for a period of time. Basically, it is easy to open a software. Master Lu detects that the CPU temperature exceeds 80 degrees, and the fan blows and shakes.
As the saying goes, if a worker wants to do good, he must first sharpen his tools. In order to clear the dust, I have done enough preparations. On the one hand, it is the preparation of operations, and on the other hand, the preparation of tools. Although as a technical male, but I usually do not drum up the computer for the machine is still relatively unfamiliar, in Aunt Zhang's original article read a lot of dismantling cleaning experience sharing, but did not see similar to my notebook model as a reference, Search on the Internet, live up to the expectations of an RV411 disassemble tutorial: link
After reading this article, my heart began to have a bottom, and it was not a very difficult thing to do (although it was still more complex than many other brand models, the earliest plans to change the keyboard, its keyboard can not be from C The surface is removed directly. To remove it, remove the motherboard from the D side.) Next is the tool's preparation, drying a tool used this time family portrait:
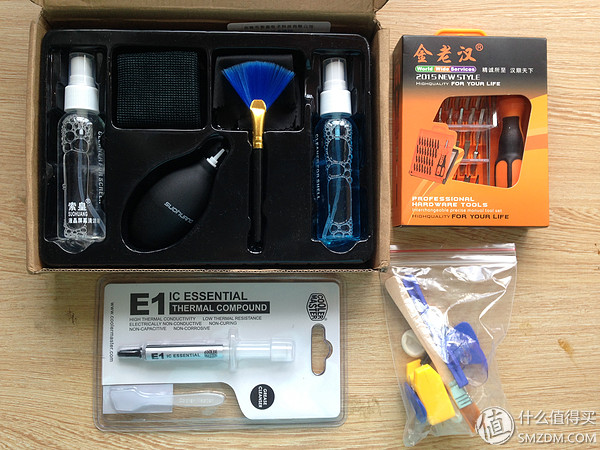
The upper left is a laptop cleaning kit, Tmall 9.9 (Oh, it seems that the price rises), the quality is flat but the price is touching, anyway, all the cleaning kits are also the same thing.
The top right is the old man screwdriver set, Taobao 8.8, a bunch of search links, and really is very easy to use, the family is necessary to put a set of it. Saying that the name of Kim Old Man always gives a kind of meaningful rush.
The bottom left is the focus! Cool Master thermal grease, oh yeah forget to say that the bottom right is to buy disassemble gadgets donated by Golden Old Man.
After all the tools here are introduced, the next step is to enter the stressful opening session.
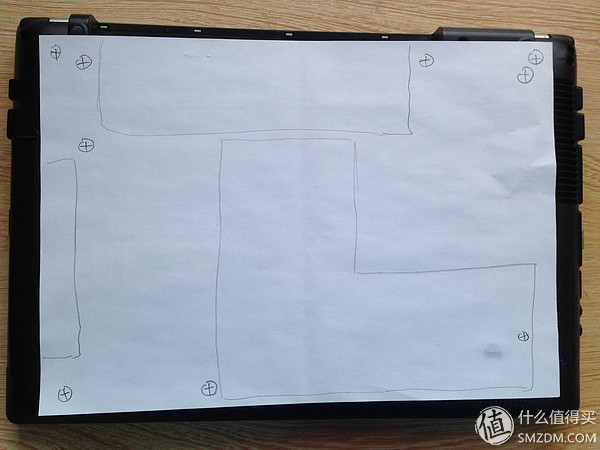
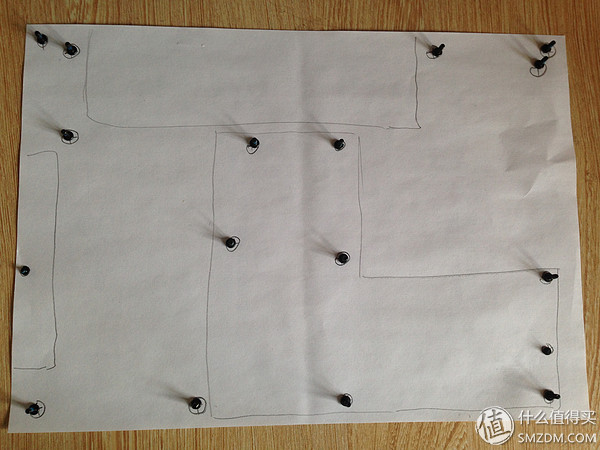
Since I was a young driver who was just on the road, some preparations were still to be done. Prepare an A4 paper, draw the outline of the back of the notebook, mark the position of the screw visible in front of the eye, and remove each screw. Place it in the corresponding position on the paper, so that when you come back to reinstall the backplane, it is unusually easy.
Disassemble the first step first turn off the power, unplug the battery, press the power button several times and stand still for a few minutes to fully discharge the notebook to prevent residual static electricity during operation damage the circuit board.
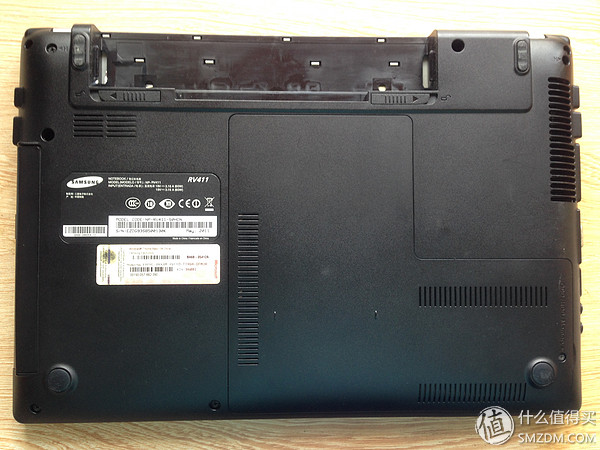
Unscrew a screw and you can see the memory stick and hard disk. This location is convenient for users to easily replace the memory stick and hard disk to enhance the notebook.
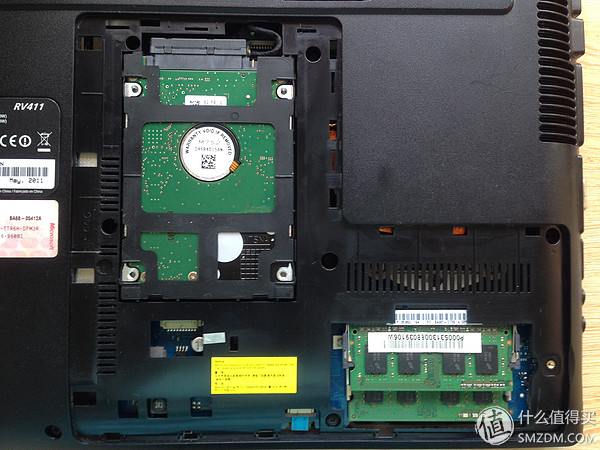
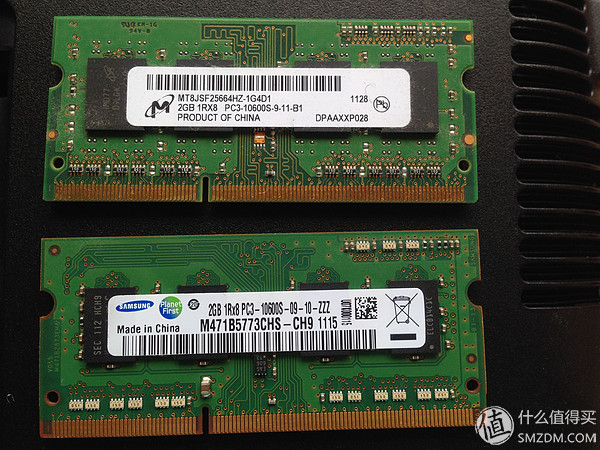
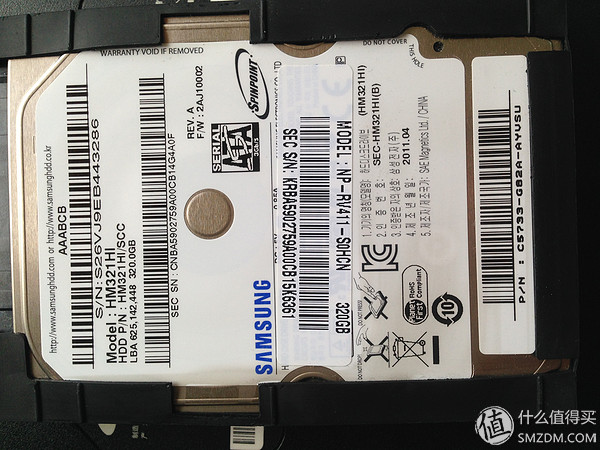
When the memory bank was bought, there was only one 2G. Later, the university roommate bought a 4G to replace his 2G memory. The rest of the 2G was picked up by me and formed a dual channel. Hard disk is used for 5 years now, and occasionally there will be abnormal noise, my precious resource station. Take down the hard disk and memory later two big pictures to see,

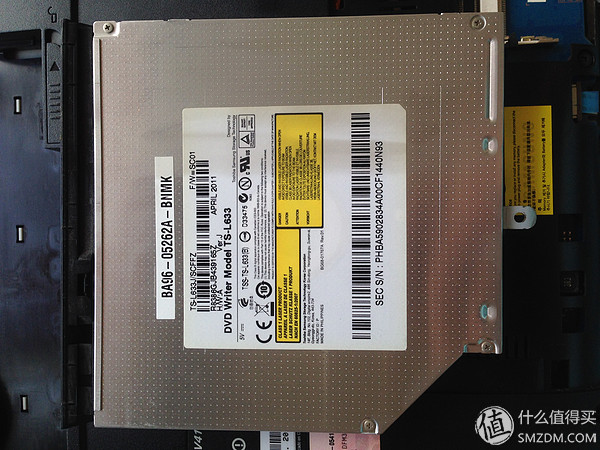
Then remove the screws on the left side of the hard disk slot, you can pull out the drive, read Zhang Aunt's experience in sharing a large number of notebook upgrades, have mentioned that the optical drive removed, replaced hard disk tray after the installation of hard drives, have the opportunity to be so To do it here ~ want to ask you, SSDs and mechanical hard drives, which put the hard disk slot, which drive is more reasonable to drive it?
The simple part has already been completed, the next step is to test the skill, need to remove all the visible screws, and then remove the very very tight cover, get your hands hurt, but also pays off effort, see the motherboard The moment was still a small sigh of precision in the electronic process.
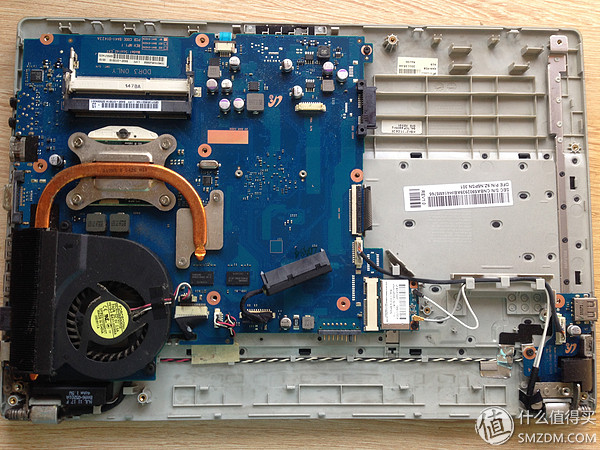
After seeing the real one, you can clearly see that there is a layer of gray on the motherboard, but this is not the point. The important thing is the heat sink! This gray thick blocked the outlet, no wonder it would be over 80 degrees.
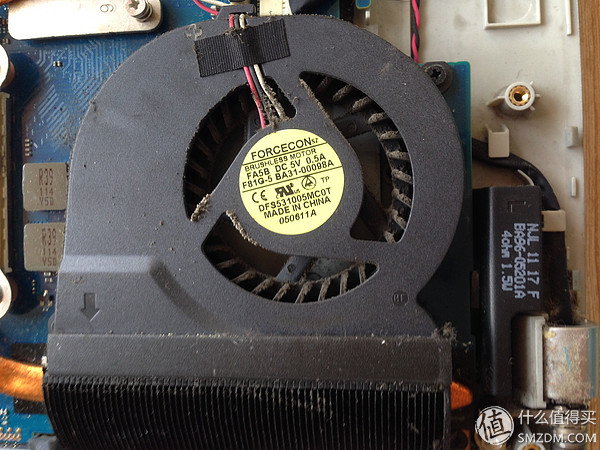
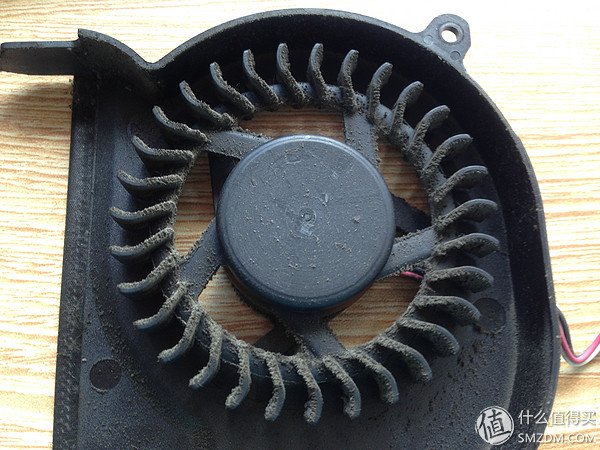
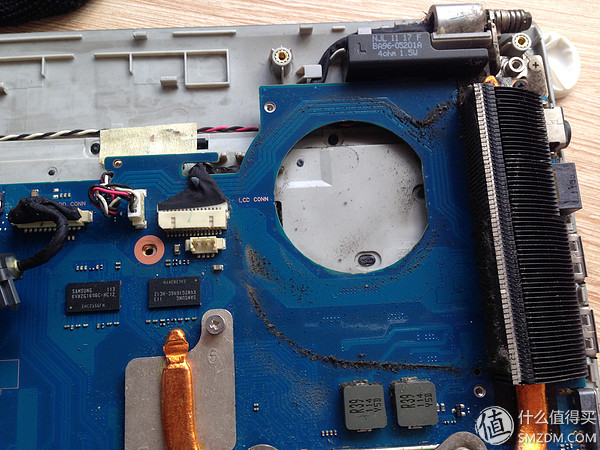
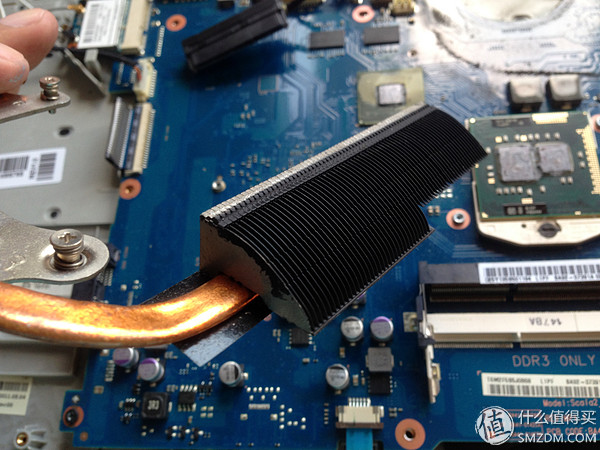
Be careful when removing the heatsink. Gently unplug the connection between the heatsink and the motherboard. See that the back of the heatsink is also in danger. By the way, it also cleaned up the thick deposit on the motherboard, which was inhaled and sucked again.

Because of the line, did not dare to go into the water, brush the gold man veteran gifts kinda hurries, the finished ash feels glorious and there are wood, clear the outlet before the excitement to forget to take pictures, the effect of clean up directly.
The cleaning work came to an end here. The second theme of this time is to re-apply thermal grease. Before this operation, I actually did not know that heat dissipation still requires the existence of this milky liquid, and it is quite important. Let's share science together. The following is taken from Baidu Encyclopedia.
It's very prudent to use a wide range of powerful functions that are almost never solidified, because I already have this:
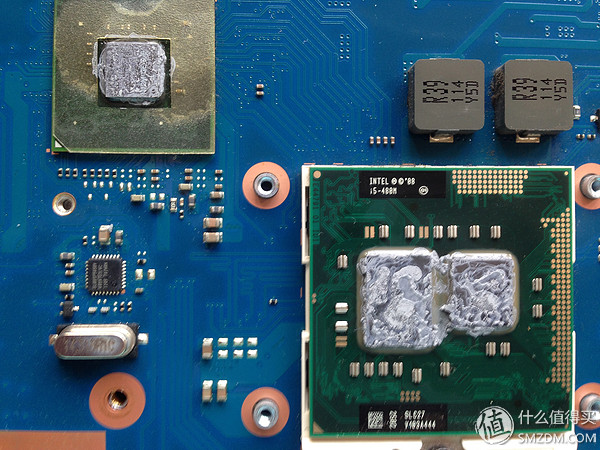
It was dry and hard, and only one residue left was lost. As a machine that has been fighting for 5 years is really suffering you, I will give you a fresh milky liquid.

First of all, we must use the alcohol cooler to cool the residual solids, and squeeze two drops of silicone grease through a syringe. Spread it evenly with a matching scraper. In fact, when I first scraped, I was very careful. There was no spillage to the edge, but it was found that it did not completely cover the central area, and that a lot of it went up, but it also completely wrapped the key parts. After installing the radiator, you're done.
Afterwards, we can't just rush to go away like this, but we must remember to follow the steps of dismantling and put each of the accessories back. This time suddenly comes to an ah. I forgot how to install it and I regret it. Record all the way over.
Well, in fact, this is not the final state. The position of the heat sink's screw is not painted, but this is really a good help to install it. This Samsung RV411 dismantling dust coating new grease to the entire process here is also over. Look at the final effect, static at about 40 degrees.
Finally sum up personal experience:
For older laptops or desktops, the ash removal process has a great effect on rejuvenation, and pro-tests work well for a while.
Whether the temperature is abnormal or not can be installed by Master Master Lu to detect it. If the temperature is too high, the software will display the warning in red.
The tools are all ready in advance, do not wait for the machine to open half found a screw without a suitable screwdriver to screw it.
Either the homework is done in front of them, or they are taken with a small copy. Take care when disassembling the machine. Check whether your notebook has a disassemble guide on the Internet. Using A4 paper to record the position of the screw is very effective.
The method of smearing the thermal grease is also stressful. There are some tutorials on the Internet but the levels are not uniform here. The basic principle is to cover as thin as possible but evenly cover.
Doing such a maintenance is also a thorough insight into your own notebook. For example, I have learned that its CPU can be replaced under this package. It is understood that the thickness of the optical drive can replace the corresponding hard disk tray, as well as the location of the hard disk and memory. And dismantling methods facilitate future upgrades.
Thank you for seeing the last and hope that everyone can maintain their beloved books and continue to support Zhang Aunt in the future!