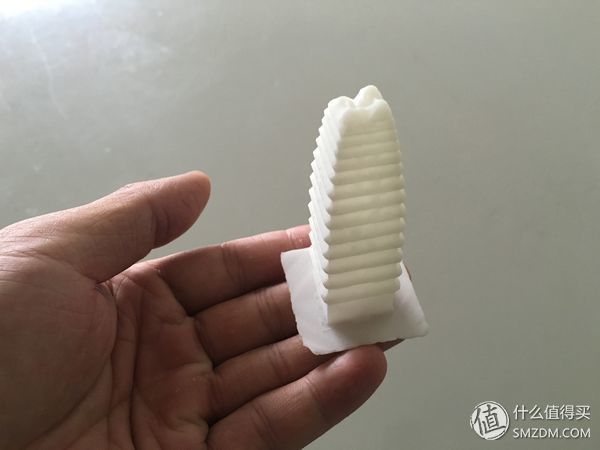
In your opinion, is UAV aerial photography only used to make friends and microblogging? However, the actual aerial photography application is tens of millions. For example, you can print the Little Wild Goose Pagoda into a 3D model through Aerial Aerial Goose Pagoda and finally get the data through aerial photography. Let the drone become a production tool! Today, this article will also be divided into two articles to introduce if you achieve this process.
This issue comes from the latest July issue of Focus magazine (Tmall).
Author: I remember my senior year preparation for graduation thesis. I thought for a long time I hadn't come up with a proposition. When I was distressed I saw an article constructing a 3D model. At the same time, my friend bought a wizard 2V+. One idea emerged was the use of multi-angle aerial images to construct a 3D digital terrain model.
Today, many people are still very interested in this subject, so this time I will combine super-portable and powerful "" Mavic Pro "Mavic Pro, practical application demonstration of how to conduct single target aerial modeling.

Early period:
First, we must determine the goal or scope of the modeling. I divided aerial photography modeling into two general types, namely interest point target modeling and large-scale target modeling. Target modeling of interest points refers to the modeling of targets within a concentrated area, such as a hill bag, a building, and several buildings that are clustered together. Naturally, it can be subdivided into individual targets and collective targets. Such modeling can usually use the point-of-interest method to capture the initial material. Large-scale target modeling As the name implies, it refers to buildings, terrain, and other targets within a relatively large area. It is usually possible to use waypoint planning to capture multi-angle images and collect materials by adjusting the tilt of the platform to a suitable angle.
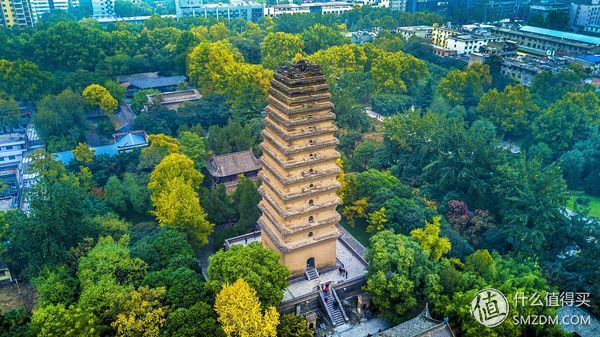
The case taken this time is the famous scenic spot Xi'an Small Wild Goose Pagoda, modeling a single object for this classic building.
The equipment used to shoot is also the "Majestic" Mavic Pro of the DJI Daji, which is considered as an aerial drone. It should be considered as an entry-level drone.
In the beginning, you must first set the camera, switch the shooting mode to the camera, then click the parameter adjustment button on the right side to enter the camera mode, select the timer, if you want to shoot DNG format, the minimum is 10S, but we generally take JPEG Yes, the more photos you take, the more effective your modeling will be, but you won't be able to do too much, or your computer won't have enough. You can set a 5-second or higher. The settings for the photo shoot will be settled.
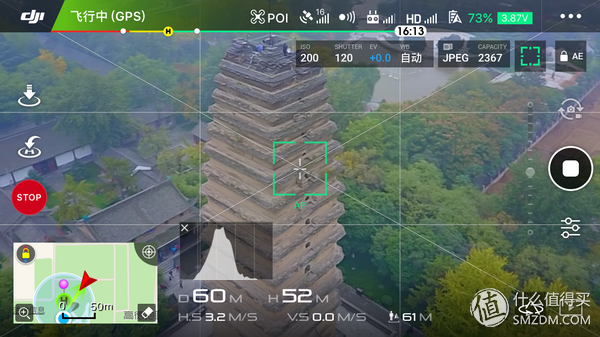
This tower is really the best textbook for single target aerial photography modeling. It directly flies the DJI Dajiang “Mavic Pro†to the top of the tower. Of course, everyone flying in such a place must pay attention to all aspects. Safely and keep the aircraft in line of sight (distance 500m, height 120m).
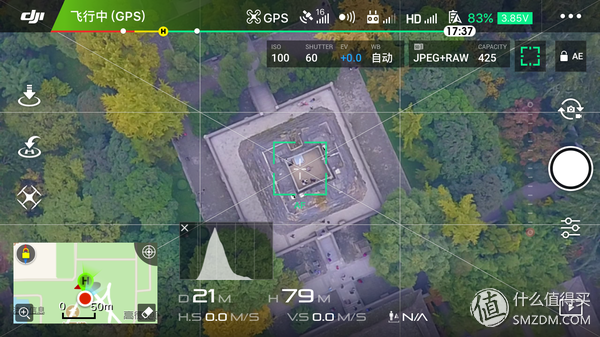
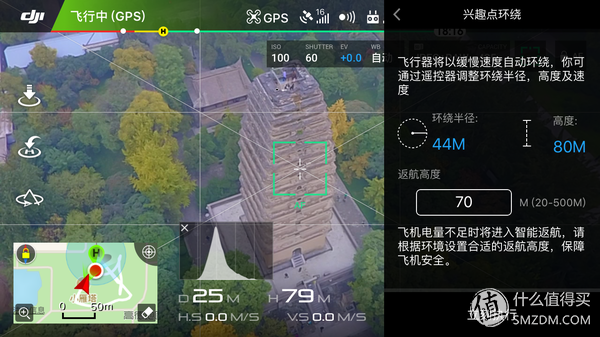
After confirming safety, click on the left side of the small drone to enter the point of interest orbit mode, this time the point of interest is set to the location of the aircraft, this time the height of the surround height.
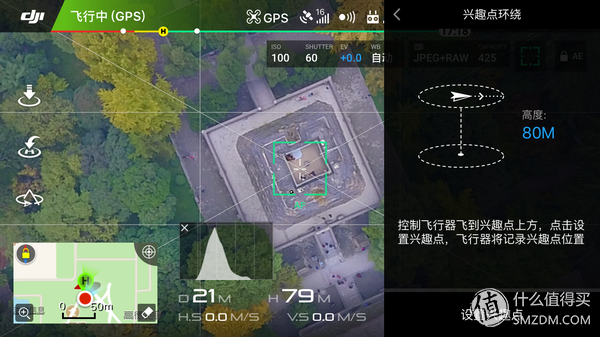
Pull the remote vehicle to a suitable distance. This distance is the radius of the circle. We can see all the data in the right window. The return altitude at this time can be modified, and everyone can make appropriate adjustments according to the specific flight environment. At the same time, we can also see that the hints indicate that we can adjust the radius through the remote control, which also brings convenience for subsequent shooting. The camera needs to be adjusted at this time. The entire building will be placed on the screen, and there is no need to manage the composition. The goal is to capture the whole image and not to lose it. Set the proper flight speed to start the round flight.
After starting to fly around, hide the point of interest around the interface and start taking pictures. During the photo taking process, there will be a brief black screen. Do not be afraid and let it be shot boldly.
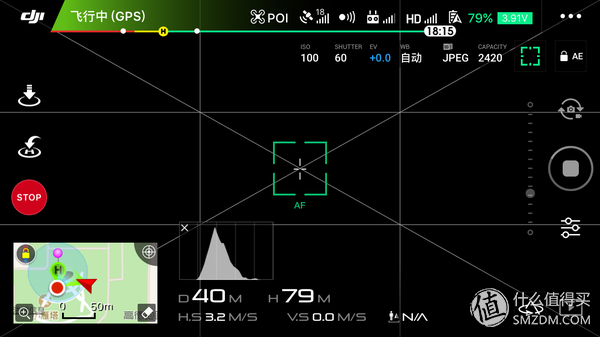
During the shooting, it must be ensured that at least one circle is taken completely from the building and it is completely placed on the screen. From the data below, it can be seen that the height is steadily maintained at 79m, there is no phenomenon of height loss, and the aircraft is pointing more positively, indicating that the flight performance of the “Yu†Mavic Pro is sufficient to shoulder the heavy responsibility of aerial modeling.
There is a chance that there will be obstacles between the aircraft and the remote controller during the process of the point of interest. Do not panic and do not rush or turn off the remote controller. You should adjust the position and orientation of the antenna to face the direction of the aircraft. If it is lost at this time, the aircraft will continue to interest the flight path set by the function. Do not turn off the remote control. When it flies over the blocked signal, it will be connected again. Because the signal of "Yu" Mavic Pro is still relatively strong, so I specifically went to the next room and simulated the situation of signal blockage. Facts have proved that the signal is really good, there are three grid remote control, the figure did not pass out.

After completing the lap of the circle, we will begin to adjust the flying height and radius. The previous radius is 44m and the height is 80m. We can adjust the position of the aircraft through the remote control to change the radius and height of the flight. Flying towards the point of interest will reduce the radius of the aircraft. On the contrary, it will increase the radius. The height of the lifting throttle will directly correspond to the height of the aircraft. If you make a turn, you will change the orientation. This is not necessary. If you accidentally tune it, click Reset to re-point the point of interest.
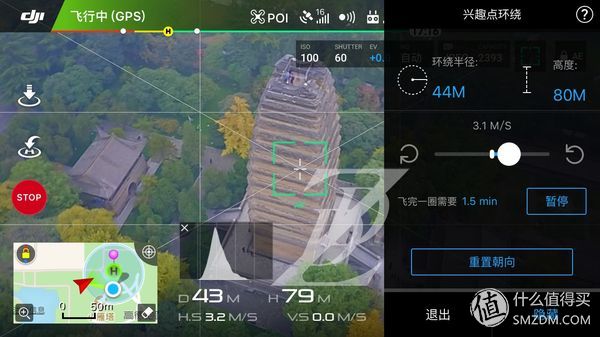
Since one circle of the overall contour has already been captured, we can get close to the place where the building photographs some details, so we don't need to wrap the whole building in the picture. We only need to focus on the details. For example, the external body of the Wild Goose Pagoda is not regular. To build these details, it needs to be more closely photographed, so the aircraft is photographed with its radius reduced.
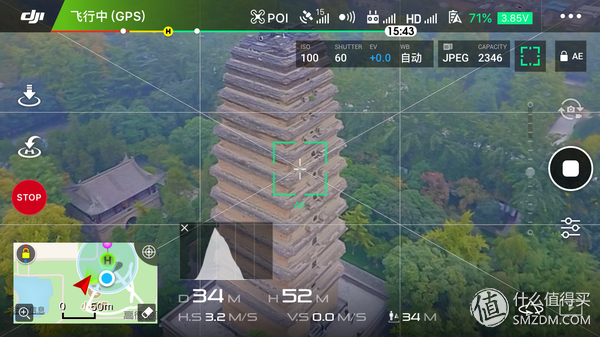
Since the tower is basically a straight up and down structure, it is also necessary to reduce the height to record in-depth details. The quality of the photographs taken will directly affect the production of the later textures. The clearer the better.
See here everyone should understand why we want to choose the way of interest to surround the shooting material. On the one hand, the points of interest surround the characteristic records of such targets in more detail and comprehensiveness. On the other hand, the DJI GO operation is of low difficulty and high intelligence, and it is convenient for adjustment of flight data during flight shooting, and provides for the collection of our materials. A lot of convenience. Of course, the use of points of interest in the process of the "Yu" Mavic Pro's side is no obstacle avoidance function, so be careful not to have obstacles, otherwise it is a bit dangerous.
At the same time, we must have a basic understanding of the regional targets we modeled before we fly, because only the places captured by the aircraft can be modeled, obscured, or incompletely photographed, then the post-modeling will be black, and the effect is not Ideal, so consider in advance during the flight. We can see that every edge of the small wild goose pagoda is extended. If it is only looking down, it cannot be collected under the edge. Therefore, it is necessary to reduce the flying height, shoot horizontally or diagonally upwards, and collect all the contents.
Usually, if the modeling precision requirements are not very high, individuals think that two or three circles around the shooting at different heights can basically meet the needs of modeling, if there are some details of the place around the flight is also unclear, You can take the aircraft out of the orbital mode and fly to the appropriate position for shooting. It can be identified later. The general principle is to collect as many image information as possible for the target, avoid blind spots, and pay attention to safety.
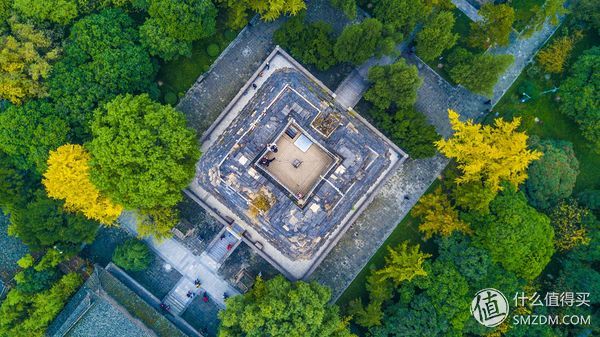
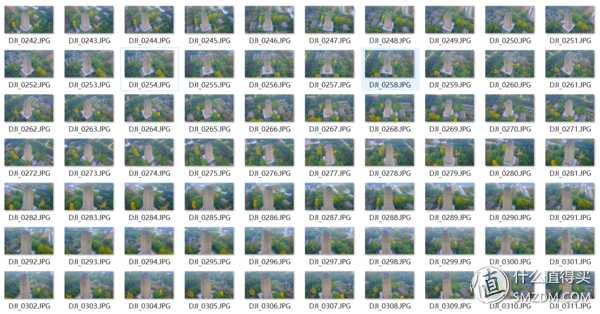
In the end, we got such a series of photos that contained all the image information of the buildings we needed. We created a separate folder and put it in. Our preliminary material collection was completed.
Judging from the collection process, the flight performance of the Majestic is very good. There is no situation of high altitude during the round flight. At the same time, the sharpness of the captured picture is relatively high. Although the wide angle is smaller, it is not Affect post-production.
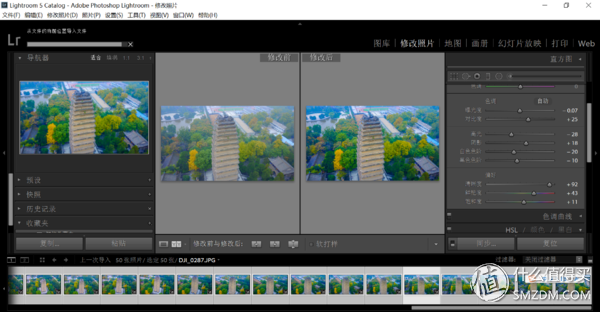
Before modeling, it is recommended that you use the lightroom software Lightroom to adjust and color the captured images. This has a direct impact on the skin color of the model after the post-modeling. The relevant specific methods will not be described here. There are many tutorials on the Internet and everyone can learn.
After the image is processed, it can be directly exported, and the color of the aerial image is correct and colorful. This time, the material will help us to carry out later modeling applications, that is, the next 3D content modeling.
The above exclusive content comes from "Focus" magazine's July 2017 issue. The author is Zhang Kai. What is worth publishing is the exclusive publication. If you refuse to reproduce it in any form without permission, interested friends are welcome to pay attention to us.
The author of this article @ Wechat Magazine's WeChat public number - Focus Magazine, WeChat search "jiaodianzz".
What is worth buying netizens:
How are you! We are the "Focus" magazine. Focus magazine is a magazine that promotes the distribution of aerial photography vision and travel life culture. Because it is a favorite platform for what it is worth to buy, so from today we have settled in what is worth buying and hopes to be in aerial photography. The visual and tourism life culture provides more information for everyone.
If you like our content or have any questions you want to learn, please pay attention to our "Focus" magazine.
Infrared Pen,Infrared Touch Pen,Infrared Tablet Stylus Pen,Infrared Stylus Pencil
Shenzhen Ruidian Technology CO., Ltd , https://www.wisonens.com