Note: The installation steps are the opposite of disassemble! Pay attention to unsure friends is best not to disassemble, the consequences you know!
Preparation tool: a small Phillips screwdriver and hair dryer!
Disassemble the object: nut P1.
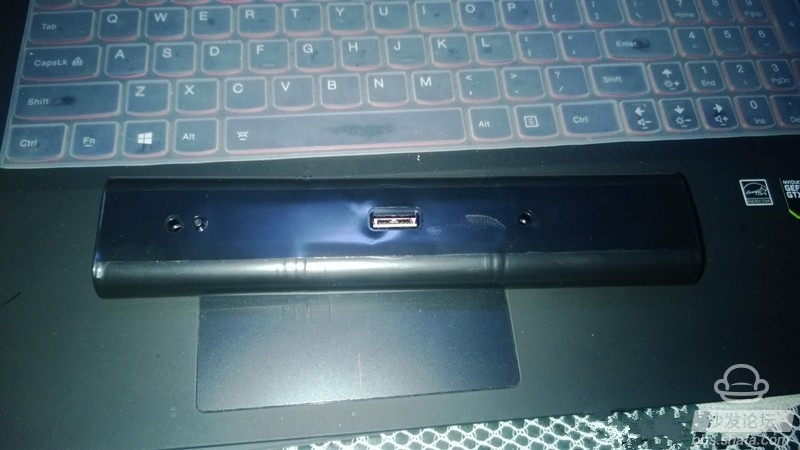
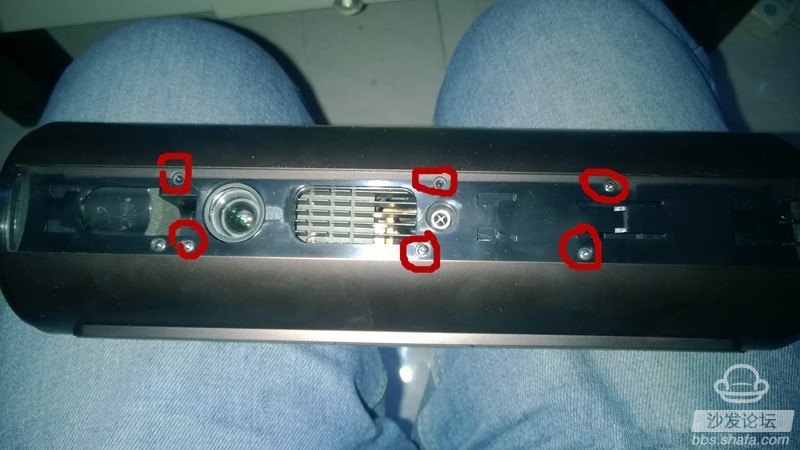
1, first remove the front baffle

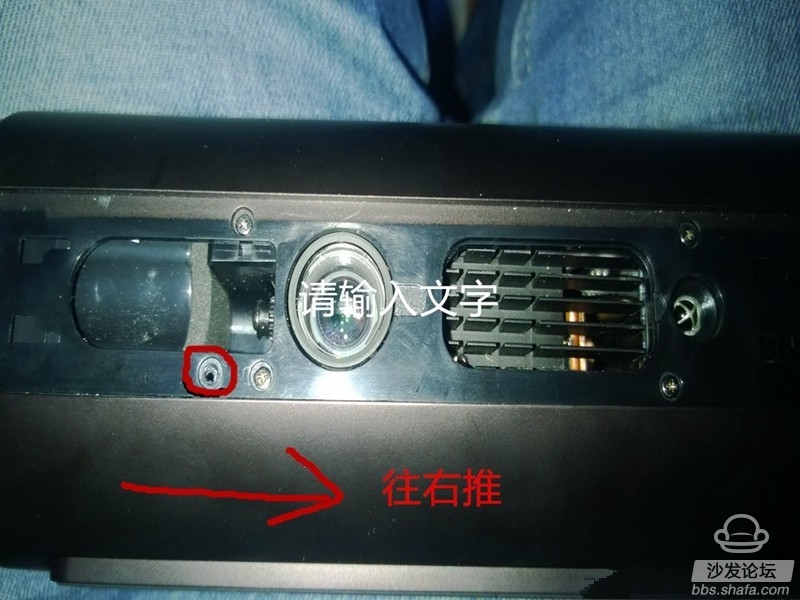
2. After removing the front baffle and removing the red circle screw, push the bottom case to the right!
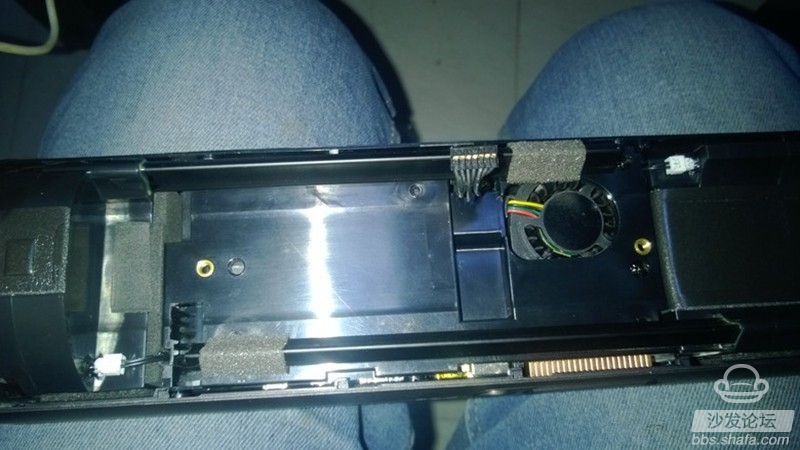
3, then remove the screws on both sides of the battery, remove the battery cable to remove the battery pack, without any parameters above! Through the touch probe p1 battery pack is composed of six 18500 lithium batteries, a large number of such a treasure on the battery, which is still convenient for p1 battery replacement!
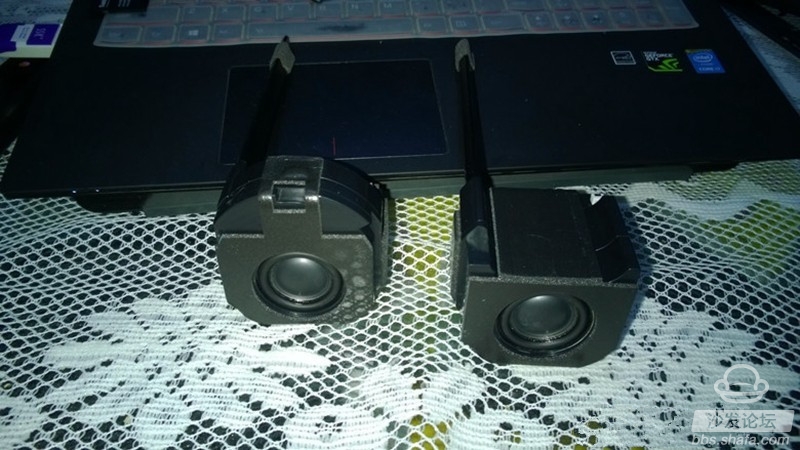
4, next split p1 speakers, speakers without any screws, remove the cable directly out on the line! This is a speaker, not a kind of single speaker, no sound quality at all, at most hear a ring. And nuts are not a level!
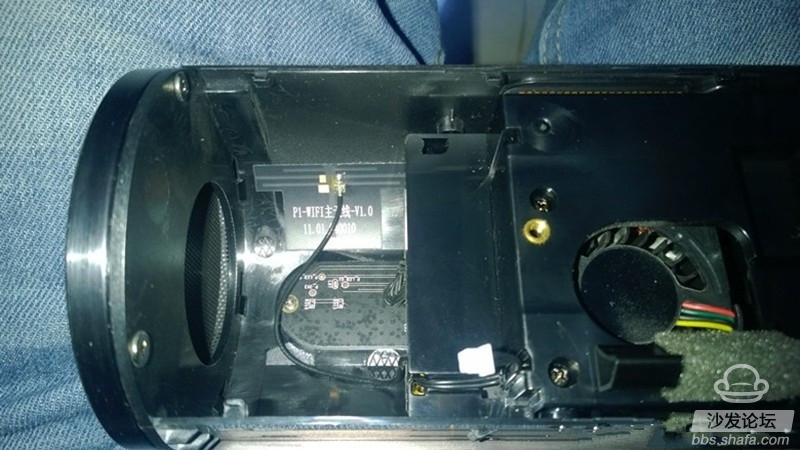
5, the next is the most difficult to split, antenna, p1 total of three antennas, wifi two, Bluetooth one, three lines we just take the wifi antenna and Bluetooth antenna removed on the line, wifi main antenna long enough, so do not take apart It, the back of the antenna is a self-adhesive, directly attached to the shell, can not be disassembled, is a yellow film antenna, is very thin, the welding seat is easy to fall off, we can use the hair dryer to heat the antenna, blow a few minutes Then slowly peel off the antenna!
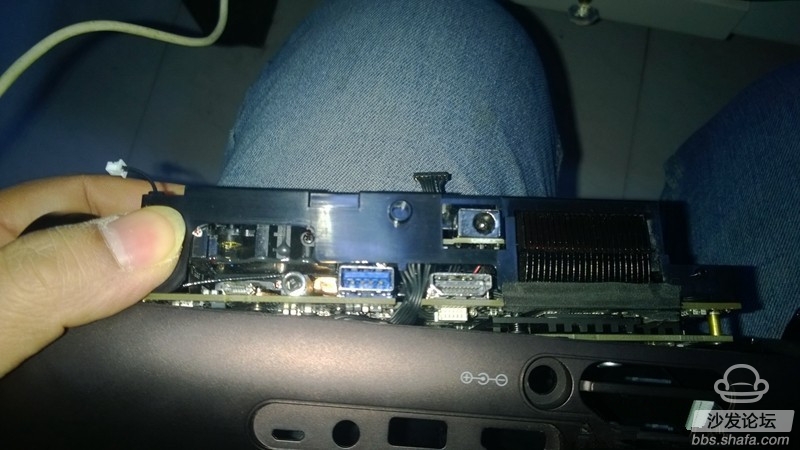
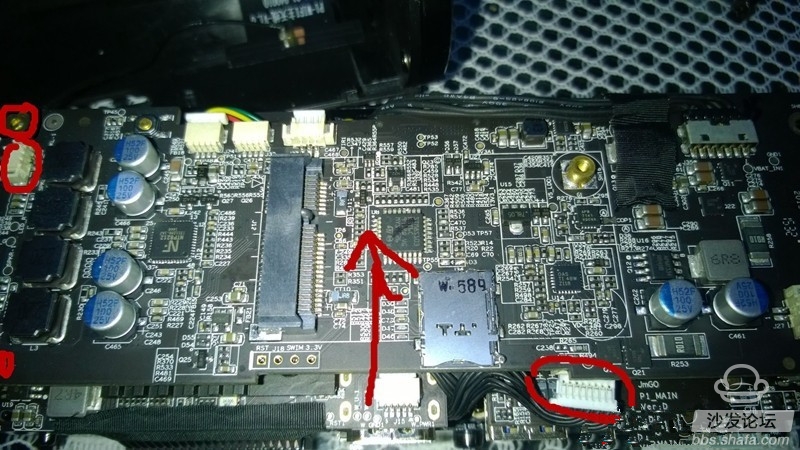
6, immediately followed by the removal of the six screws in the red circle in the picture, then slowly remove the motherboard, pay attention to the following button cable, pull it out! ! !
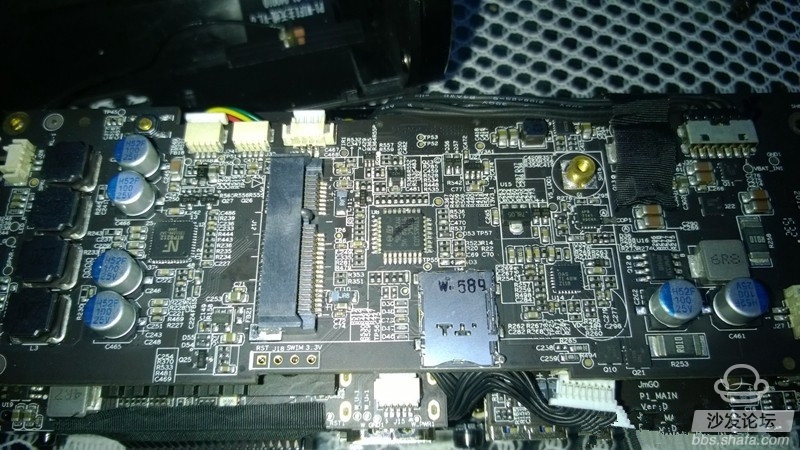
7, you can see the red circle is an expansion slot, what can be specifically expanded is not clear!

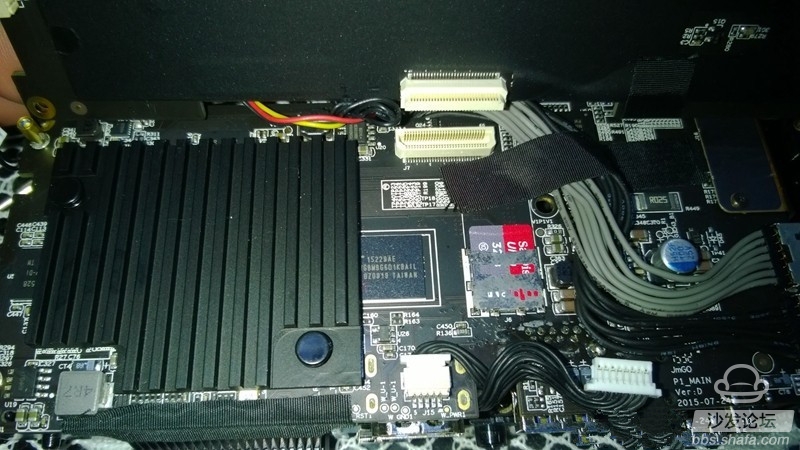
8, then we want to change the TF between the two boards, so we have to remove the above board to see the TF card slot, remove the four screws in the figure, the picture did not shoot the whole, the other two on the right, Pull out the two speaker cables and the cables in the red circle. Do not move the other cables. Open the motherboard slowly in the direction of the arrow!
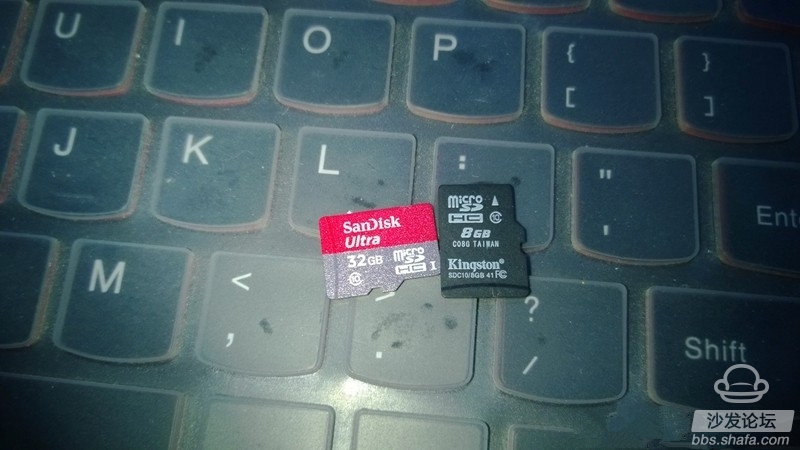
9, after opening the motherboard we see the TF card slot, the right one is the original card of P1, C10 8G Kingston TF card, the left one is to change the C10 32G Flash Di TF card!
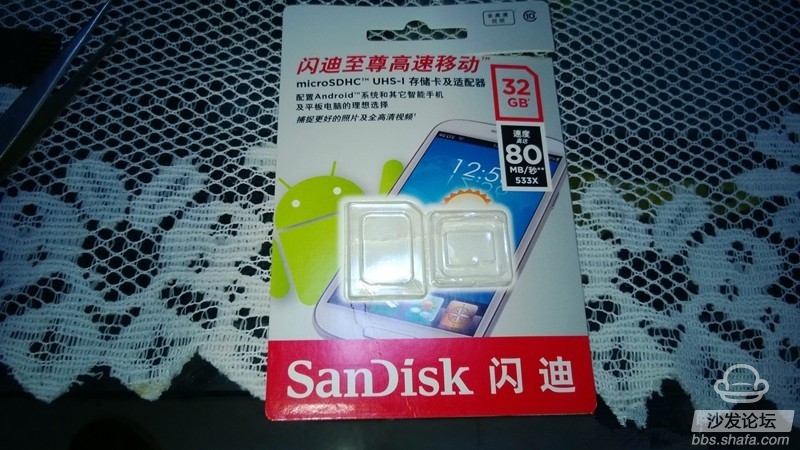
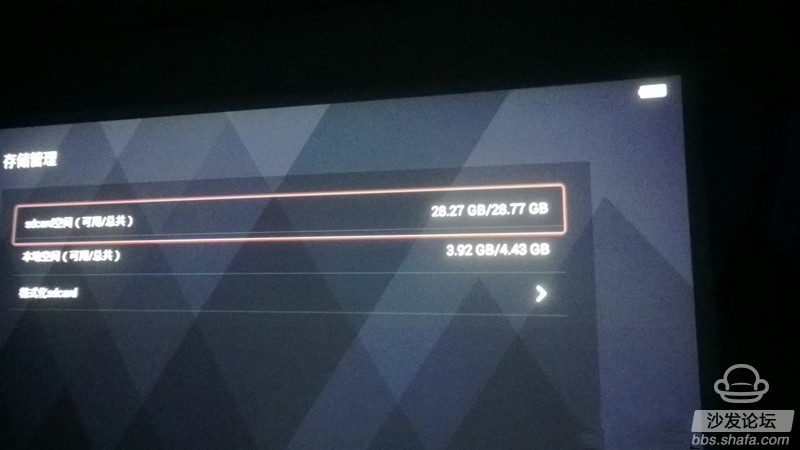
Take a look at the results, my mother no longer have to worry about my P1 memory is not enough! As for the maximum support of P1 TF card, the official is known to support the maximum 32G, and then big is not clear!
Preparation tool: a small Phillips screwdriver and hair dryer!
Disassemble the object: nut P1.
1, first remove the front baffle
2. After removing the front baffle and removing the red circle screw, push the bottom case to the right!
3, then remove the screws on both sides of the battery, remove the battery cable to remove the battery pack, without any parameters above! Through the touch probe p1 battery pack is composed of six 18500 lithium batteries, a large number of such a treasure on the battery, which is still convenient for p1 battery replacement!
4, next split p1 speakers, speakers without any screws, remove the cable directly out on the line! This is a speaker, not a kind of single speaker, no sound quality at all, at most hear a ring. And nuts are not a level!
5, the next is the most difficult to split, antenna, p1 total of three antennas, wifi two, Bluetooth one, three lines we just take the wifi antenna and Bluetooth antenna removed on the line, wifi main antenna long enough, so do not take apart It, the back of the antenna is a self-adhesive, directly attached to the shell, can not be disassembled, is a yellow film antenna, is very thin, the welding seat is easy to fall off, we can use the hair dryer to heat the antenna, blow a few minutes Then slowly peel off the antenna!
6, immediately followed by the removal of the six screws in the red circle in the picture, then slowly remove the motherboard, pay attention to the following button cable, pull it out! ! !
7, you can see the red circle is an expansion slot, what can be specifically expanded is not clear!
8, then we want to change the TF between the two boards, so we have to remove the above board to see the TF card slot, remove the four screws in the figure, the picture did not shoot the whole, the other two on the right, Pull out the two speaker cables and the cables in the red circle. Do not move the other cables. Open the motherboard slowly in the direction of the arrow!
9, after opening the motherboard we see the TF card slot, the right one is the original card of P1, C10 8G Kingston TF card, the left one is to change the C10 32G Flash Di TF card!
Take a look at the results, my mother no longer have to worry about my P1 memory is not enough! As for the maximum support of P1 TF card, the official is known to support the maximum 32G, and then big is not clear!